Wainscoting is an elegant way to enhance your walls while adding practical value to your home. Its timeless charm and versatility make it a popular choice for homeowners. Even better, you don’t need professional help—DIY enthusiasts can achieve excellent results with the proper guidance.
In this guide, we’ll walk you through the process of installing moulding for wainscoting. From planning your design to avoiding common mistakes, you’ll find everything you need to know to make this project successful.
Why Wainscoting is a Great DIY Project?
Wainscoting offers more than just visual appeal—it’s also highly functional. It protects walls from scuffs and scratches, making it ideal for high-traffic areas like halls, living rooms, or dining spaces. Plus, it’s cost-effective, meaning you can give your walls a designer look without breaking the bank.
Did you know wainscoting can also increase your home’s resale value?
Tools and Materials You’ll Need

Before diving in, gather these essential tools and materials to make the process seamless:
Tools
- Measuring tape
- Miter saw, or hand saw
- Level
- Pencil
- Adhesive glue
- Nail gun or hammer
Materials
- Pre-cut moulding or raw moulding strips
- Sandpaper
- Primer and paint
- Wood filler or caulk
Pro Tip: Choose lightweight materials like MDF or PVC for easy handling. They’re also budget-friendly and widely available.
Step-by-Step Guide to Installing Wainscoting Moulding
Step 1: Plan Your Design
Start by deciding on the style and height of your wainscoting. Popular styles include:
- Flat Panel: A clean, minimalist look for modern homes.
- Beadboard: Perfect for traditional or cottage-style interiors.
- Raised Panel: A sophisticated option for formal spaces.
Use painter’s tape to map out your design on the wall. This will help visualize the final outcome and make adjustments before cutting any materials.
Step 2: Prepare the Walls
Preparation is key to confirming a flawless finish.
- Clean the Surface: Remove dust, grease, or old paint for better adhesion.
- Patch Any Imperfections: Fill cracks or holes with spackling paste.
- Mark Guidelines: Use a level and pencil to mark where the moulding will go.
Step 3: Cut and Attach the Moulding
This step requires precision, but it’s easier than it sounds!
- Measure and mark each piece of moulding to ensure a snug fit.
- Use a miter saw to make angled cuts for corners.
- Apply adhesive to the back of the moulding and hold it securely into place. For added security, reinforce with nails.
Step 4: Fill, Sand, and Paint
The finishing touches are where your wainscoting really shines.
- Fill gaps and nail holes with wood filler or caulk.
- Sand rough edges to create a smooth surface.
- Apply primer and paint in your chosen color for a polished look. Neutral tones or crisp whites are classic choices.
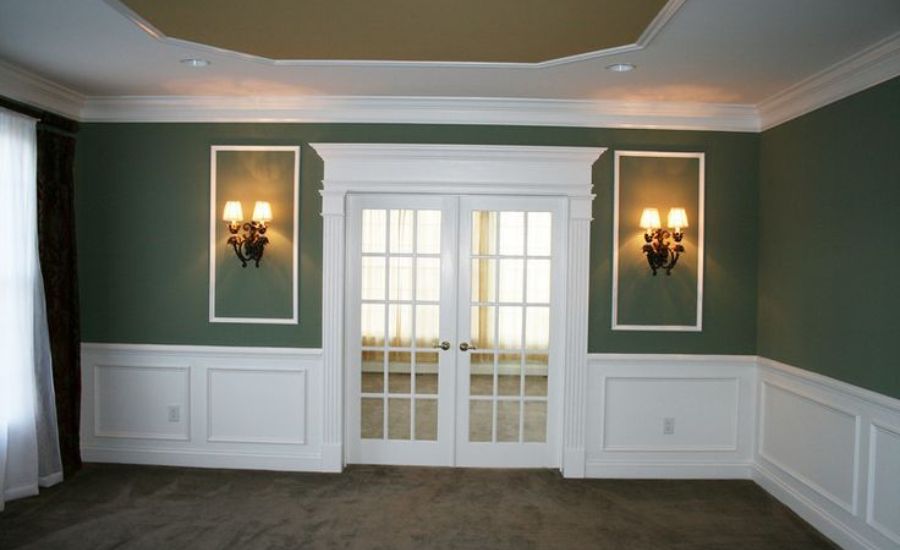
Design Inspiration for DIY Wainscoting

Here are some ideas to inspire your project:
- Monochrome Modern: Use flat panel wainscoting in a single bold color for a sleek, contemporary vibe.
- Rustic Charm: Combine beadboard wainscoting with distressed wood finishes for a farmhouse look.
- Two-Tone Elegance: Paint the moulding in one color and the wall above in a contrasting shade for depth and character.
Common Mistakes to Avoid
DIY projects are all about learning, but avoiding these mistakes can save you time and effort:
- Skipping Measurements: Miscalculations lead to uneven moulding or waste of materials. Measure twice, cut once!
- Using Poor Adhesive: Weak glue won’t hold the moulding in place over time. Opt for high-quality adhesive.
- Rushing the Finish: Neglecting sanding or skipping primer results in a less polished look.
Why Wainscoting is a Smart DIY Investment?
Wainscoting is more than just a visual upgrade—it’s an investment in your home. Studies from home advisors suggest that small but impactful DIY projects like wainscoting can significantly enhance a home’s interior appeal.
Additionally, learning to work with moulding equips you with skills for future projects, like crown moulding or baseboards.
Conclusion
Adding moulding for wainscoting is a simple yet transformative DIY project that blends style and function. With just a few tools, some patience, and a bit of creativity, you can elevate any room in your home.
So, gather your materials, follow these steps, and enjoy the satisfaction of making a practical and beautiful space. Start your DIY journey today and share your success stories to inspire others!